For my Frozen Waters project I started to work on a set of sculptures, based on my snow and ice observations. Picking porcelain as my material was an obvious choice simply because it can be bright white which works perfect when representing the whiteness of snow. I signed up for the Pottery Northwest studio in Seattle and begun my work.
In this post I would like to share with you my struggle and tell you about the creative process from beginning to the end.

When I visited Iceland in the beginning of 2018 I collected photo references of a very interesting formation I found on the Sólheimajökull glacier. Our guide explained how it forms (photos below):
1. volcanic ash falls on top of a glacier, a crevice forms on a glacier;
2. ash falls into the crevice;
3. glacier melts all around the crevice while ash covered area remains cooler and melts slower forming a peak covered with ash


A very unusual shape in the middle of glacier I thought. So, I wanted to try represent this interesting natural phenomenon in ceramic. Easier said than done it appeared.
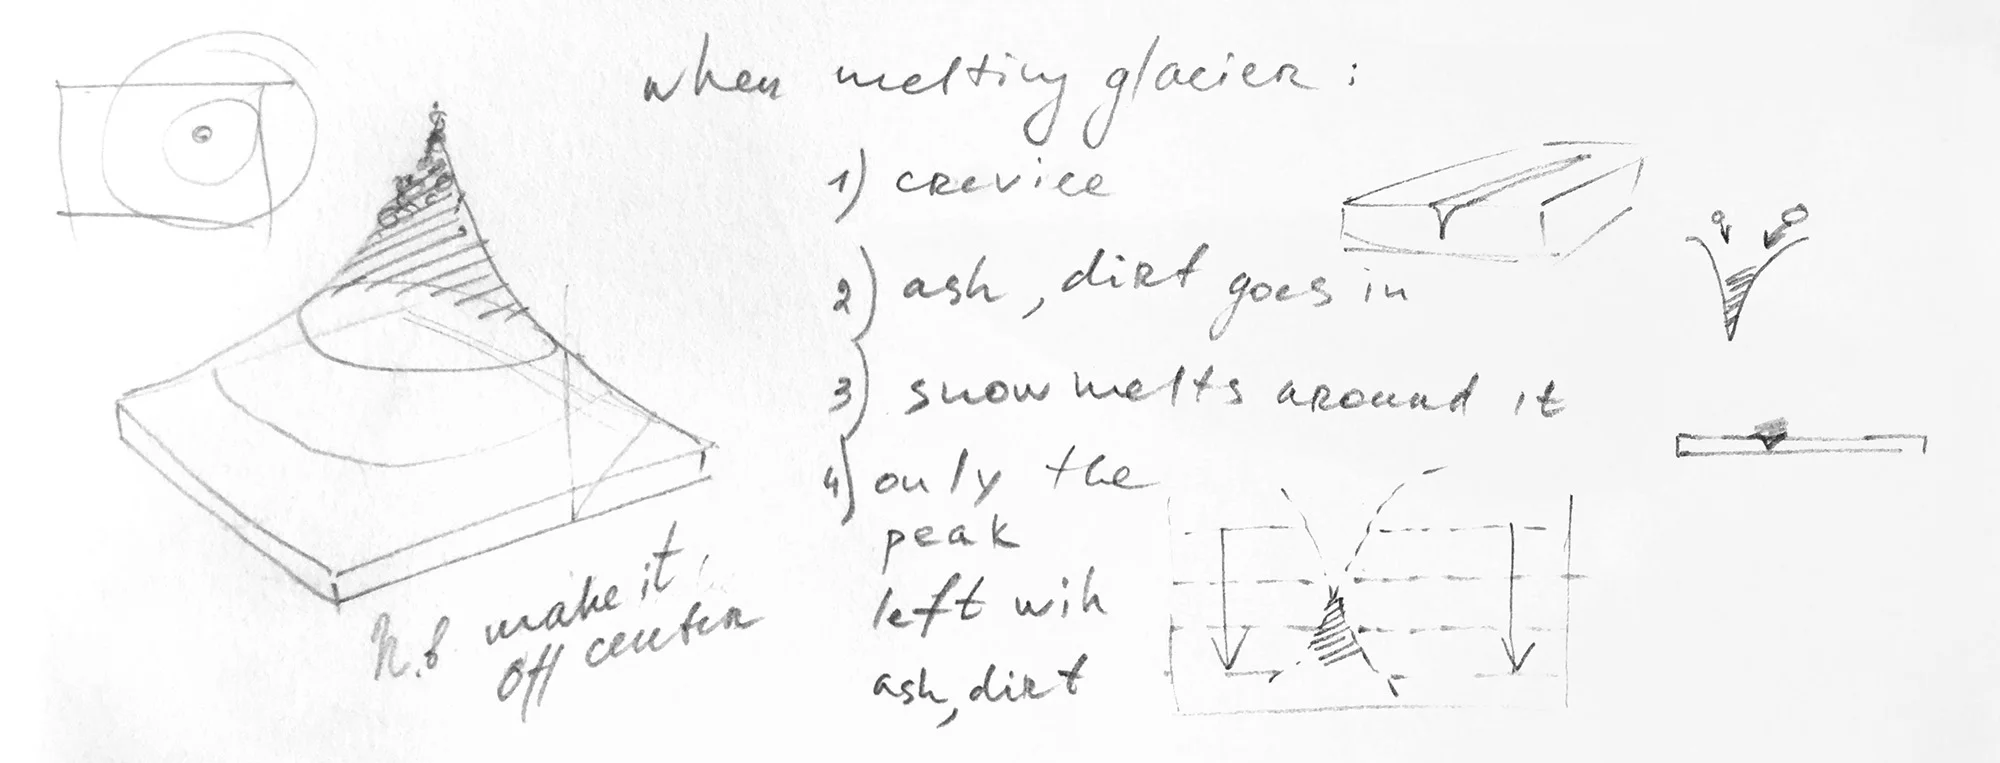
Starting with a sketch, I began to work on the project. My plan was not necessarily to copy the way it appears in nature exactly, but represent it in an artistic way. I planned on making the peak and attach the black ash rocks. In order to make such a long peak there had to be a structural support made first. Ceramics, are made hollow for multiple reasons, so I could not just make it solid (which surely would be the easiest way).

When the structure was ready – the top surface was made. Black rocks were made out of colored porcelain as well, so it would shrink at the same rate when fired. The rocks were made rough to mimic the volcanic ash. They were attached at the very end.

When the sculpture was ready it was set on a shelf covered in plastic to start slowly drying.
It was during this time when problems started. Unequal drying throughout the sculpture started to cause cracking. I made a decision the trim the base of the sculpture instead of trying to fix cracks, which would be extremely difficult.
As soon as I would leave the sculpture back on the shelf, in few days another crack would arrear.

It was almost as if the global warming was effecting my glacier and it was rapidly melting and becoming smaller and smaller in just few days. A very discouraging process, you can imagine. Eventually only the top part of the peak was left and it was now ready to go into its 1st firing (bisque).

When the sculpture was fired I had to decide on glazing and the type of kiln. Prior to the glazing I made a bunch of test tiles in the shape of hexagonal snowflakes (you can see them laying around the table). For me to be able to apply an equal coat of "New Blanc" glaze I had to apply wax all around the black rocks to resist the glaze, so they stay black and matte. The sculpture was dipped into a bucket of glaze.
Fingers crossed, the sculpture is ready and it goes into an oxidation kiln.
Here is the final look. You will be the judge and decide if I did a good job or failed.
As for me, I will try to make another sculpture, but this time I will use a different approach to try escape the cracking. It will be designed this way so I could attache the real volcanic ash which I brought with me back from Iceland.